博客部署及更新
使用GitHub Actions
将源码与vuepress生成的静态文件分开,源码放私有仓库,部署站点放公开的 username.github.io 仓库。这是很多专业开发者/博主的推荐做法,本方法正是使用这一种方法。
核心思路
- 创建私有仓库
my-blog-source,存放所有源码。 - 在私有仓库中配置 GitHub Actions,构建后自动推送静态文件到
username.github.io仓库。 username.github.io仓库只包含构建产物(HTML/CSS/JS),不包含源码。- 本地开发在私有仓库进行,推送后自动部署。
Github设置
先创建一个私有仓库,来储存博客源代码,记得将权限设置成private。

安装
如果需要获取之前放在github.io仓库上的源代码,则执行下面命令(可选)。
# -b main --single-branch 选项指定了main分支
git clone -b main --single-branch https://github.com/gaifagafin/gaifagafin.github.io.git
若是新建的文件夹,则需要安装vuepress-theme-plume。
npm install vuepress-theme-plume@latest
部署
将下面的内容保存到
~/.github/workflows/deploy.yml,没有这个文件就去创建。~/.github/workflows/deploy.ymlname: Deploy to GitHub Pages on: # 在推送到 main 分支时触发 push: branches: [main] # 允许手动触发 workflow_dispatch: jobs: # 构建工作 build: runs-on: ubuntu-latest steps: - name: Checkout uses: actions/checkout@v4 - name: Setup Node.js uses: actions/setup-node@v4 with: node-version: 20 - name: Install dependencies run: npm install - name: Build VuePress site run: npm run docs:build - name: Deploy to username.github.io uses: peaceiris/actions-gh-pages@v4 with: # 使用你自己的 GitHub 用户名替换 username personal_token: ${{ secrets.ACCESS_TOKEN }} publish_dir: ./docs/.vuepress/dist # 👇 关键:推送到 username.github.io 仓库 external_repository: username/username.github.io publish_branch: main # username.github.io 默认用 main 或 master force_orphan: true # 清理历史,只保留最新构建(可选)在GitHub仓库设置中:
- 进入
Settings→Pages - Source 选择
Deploy from a Branch
- 进入
前往项目根目录
~/,并依次执行:# 1.初始化 Git 仓库 git init # 2.添加远程仓库 git remote add origin [email protected]:<username>/<repo>.git # 或者如果你使用 HTTPS(推荐) git remote add origin https://github.com/<username>/<repo>.git # 3.创建并切换到 main 分支 git checkout -b main推送代码到main分支,依次执行:
git add .

git commit -m "setup github actions deployment"

git push origin main
更新
使用git-bash,进入博客文章根目录,依次执行:
git add .
git commit -m "change"
git push origin main
使用bat批处理脚本push
将下面的bat文件保存到~/push.bat,执行脚本即可将博客更新到网站上,这样就不用打开git-bash再依次输入那三条指令这么麻烦了。
~/push.bat
@echo off
chcp 65001 >nul
echo 正在执行Git提交和推送...
echo.

echo [1/3] 添加所有文件到暂存区...
git add .
if %errorlevel% neq 0 (
    echo 错误:添加文件失败!
    pause
    exit /b 1
)
echo ✓ 文件添加成功

echo.
echo [2/3] 提交更改...
git commit -m "change content"
if %errorlevel% neq 0 (
    echo 错误:提交失败!可能没有需要提交的更改。
    pause
    exit /b 1
)
echo ✓ 提交成功

echo.
echo [3/3] 推送到远程仓库...
git push origin main
if %errorlevel% neq 0 (
    echo 错误:推送失败!请检查网络连接和权限。
    pause
    exit /b 1
)
echo ✓ 推送成功

echo.
echo 所有操作完成!
pause
使用gh-pages
使用gh-pages需要项目的~/.git/config文件中的remote url对应的仓库是github.io仓库。
首先需要安装 gh-pages 包。
npm install -D gh-pages然后在 package.json 中添加部署脚本:
~/package.json
{
  "scripts": {
    "docs:deploy": "gh-pages -d docs/.vuepress/dist"
  }
}
然后运行:
npm run docs:build
npm run docs:deploy
gh-pages 就会自动把 dist 内容推送到 gh-pages 分支,如果你没有这个分支则会新创建一个。
可能遇到的问题
无法连接到22端口

解决方法:
在本地的~/.ssh/config文件中添加以下内容:
~/.ssh/config
Host github.com
	Hostname ssh.github.com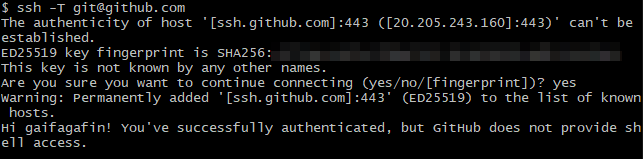
Port 443使用git-bash测试ssh -T [email protected],成功连接。